Purpose
Frequently, roof and ceiling planes extend across multiple walls or work lines. Once the planes are cut (solved) it may be difficult to identify which wall or work line planes are associated with. This often leads to selecting the wrong wall or work line when cutting other planes or profiling trusses. This feature lets you identify which walls and work lines have roof and ceiling planes associated with them by marking them with a plane tag.
Steps
To use plane tags:
- Click the Settings button on the main Layout window.
The Settings dialog displays.
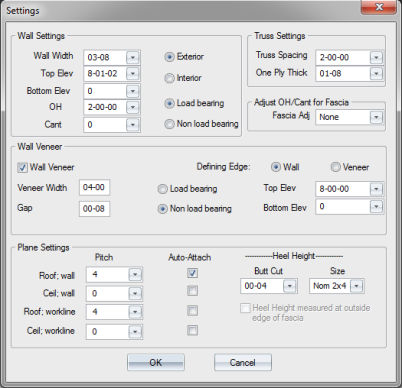
- Verify that the Auto-Attach checkbox is selected for the Roof; wall, and Ceil; wall settings.
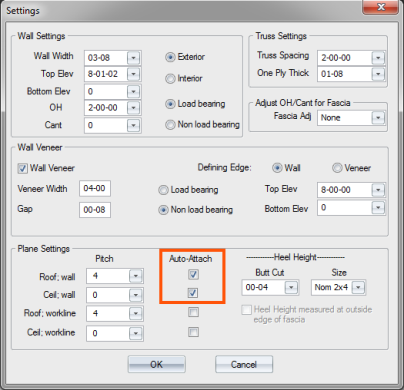
- Click OK to save your changes.
- Enter a command in the Layout Commands field.
A wall is created in the direction and the length that you input. The triangular blue roof and red ceiling plan tags are displayed in the center of the length of the wall. A sample is shown below (circles have been added to the illustration, but are not displayed in the application).
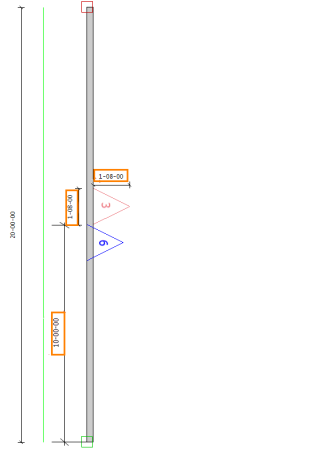
- If a roof or ceiling plane is attached to the wall, that plane is centered on the wall.
- If both a roof and ceiling are attached to the wall, the planes are displayed side-by-side with the point between the planes located at the center of the length of the of the wall.
Related Topics